It has been a while since my last post, just been through the process of buying and decorating my first house, so apologies, I am back, and posts should be more active from now on.
Videos are a great way to bring liveliness into the classroom! For teachers, a video shares content in a powerful and engaging way. For children, a video encourages interaction with a lesson or a topic by selecting images, video, music and text. Animoto is a web based tool which can put together engaging picture slideshows. Users can put together videos, pictures and music to create eye-catching videos that their audience will enjoy time and again! This is particularly effective to introduce: a topic, yourself to the class or as a tool to grab the audience’s attention!
Getting Started:
You’ll need to register a username and password and the good news is that schools and users with school-based emails can get an account at no cost! Once logged in you will be greeted with the Animoto Dashboard.

The dashboard allows you to see published material, look at your account and there is also a help section. From here you should click on create and then select the videos and pictures you would like to use in your Animoto creation.
In addition users can choose what type of video they would like to produce. This could be a slideshow video or a marketing one. I usually select slideshow but it depends on the end product and what you want to do with it.
Next users can select the style of their Animoto project. Once you click on the style you get a little preview to help you get a sense of the video’s style and how your pictures and videos will flow into each other.
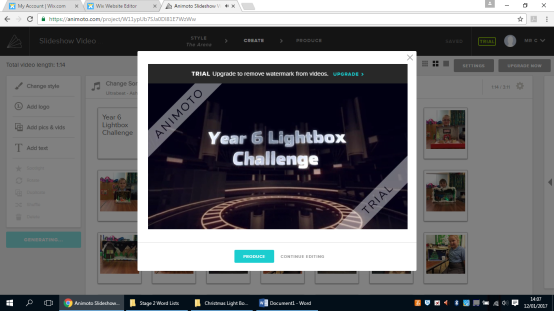
The next few steps are selecting and adding more pictures and video, the upload of them to the Animoto Cloud, creating a name for your Project and a final edit of content. The final edit can be moving pictures around to get a better flow or removing content that repeats itself. As well as all thing users can choose free music that’s available fro Animoto or add their own. After all this users can get a preview of their final product and it they wish possibly edit or produce the final product. 
Once finalised and produced Animoto videos can be shared in a number of ways such as downloading, YouTube, Vimeo and even embedded onto a school website or blog using a line HTML which can be copied and pasted.
Ideas for the Classroom:
Some of these can be found on the Animoto website and others I’ve come up with or tried for myself in class.
- Introduce yourself to your next class, with transitions/ meet the teacher coming up soon you’ll look more approachable when you use video instead of the standard introduction speech.
- Research topic –pupils will engage more with their research by presenting with video– they’ll find appropriate pictures, video and music to demonstrate their new knowledge on topics like world cultures, historical figures, or scientific phenomena.
- To start a unit/topic- Use video as a “sneak peek” of all the awesome information to come.
- To complete a unit- alternatively, videos are great for reviewing what you’ve taught. Wrap up a lesson or unit with a video of key concepts to emphasise their importance.
- Book trailer – children could make a “movie trailer” advertising a book they’ve read by matching a brief plot summary with complementary pictures–but no spoilers! Students will also love choosing a song that perfectly captures the mood of the novel.
- Pitch an idea- summing up learning is difficult, especially in 30 seconds, pupils could do this to demonstrate they have really understood a topic and its core themes, this could also be done at the end of a project based learning activity/unit
I hope you enjoy using Animoto, it isn’t the only video production tool I use but it is definitely up there as one of my go to video creators for nice, quick and effective projects.
Thanks for Reading!
Adam Chase
@_geekyteacher


